
Is your once lively living room now showing signs of wear and tear with chipped paint and cracks? Maybe your hallway has become a gallery of unwanted nail holes.
Repainting the interior is a great way to refresh and breathe new life into your space. But before you go into painting, it’s important to give those damaged surfaces the attention they need.
Inspect and Prepare the Area
The first step in this process is to closely inspect your walls and ceilings for any signs of damage, such as cracks, holes, peeling paint, or water stains.
Once you’ve pinpointed the problem areas, it’s time to start prepping. Start by cleaning the surfaces thoroughly using a damp cloth to get rid of dust, cobwebs, and grime.
Then, scrape away any loose or peeling paint by gently working from the solid edges inward. After that, smooth out the repaired areas by sanding them, as well as the surrounding surfaces, to ensure a seamless finish.
Fix the Damage
Now that your walls are clean and prepped, check for small holes and cracks. Using a spackling compound and a putty knife, fill the holes and cracks, smoothing it out with the putty knife to make it level with the rest of the wall.
You might need something stronger for larger cracks, like a patching compound that can flex a bit to cover those bigger gaps.
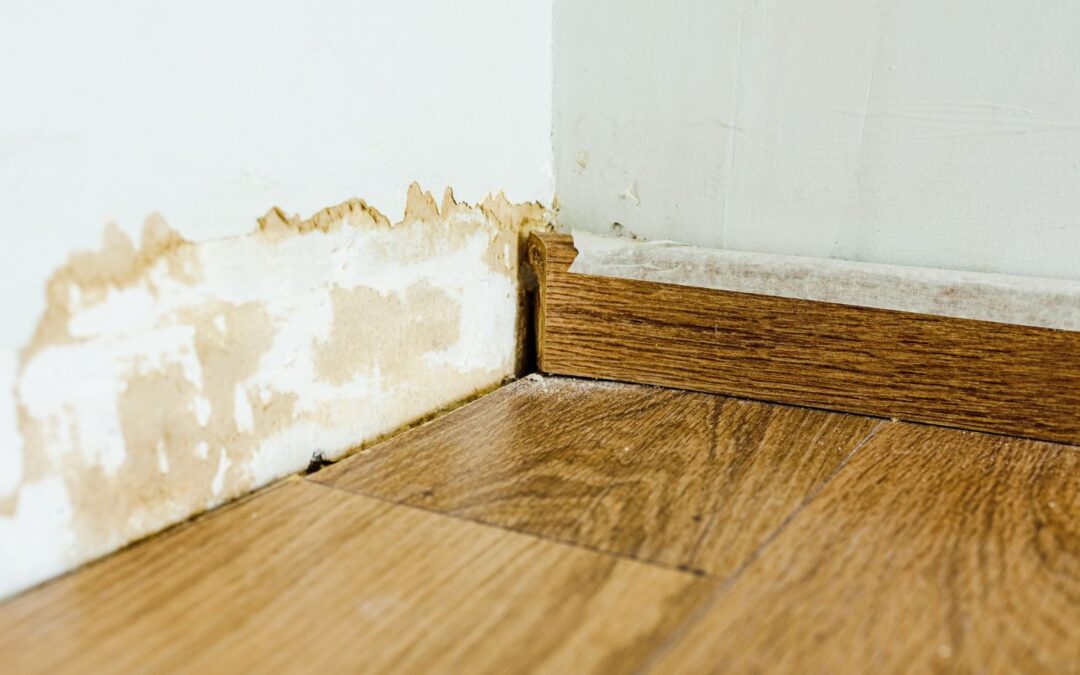
When dealing with water damage, first, make sure to fix the source of the leak, whether it’s a pipe, roof, or something else, so the problem doesn’t happen again. After fixing the leak, let the damaged area dry out completely,
If you notice any mold, mix up a bleach solution and carefully remove it. But be sure to wear gloves and goggles for protection. Once the area is dry and mold-free, scrape away any loose material.
Before you start patching and painting, apply a stain-blocking primer to prevent any leftover stains from showing through your new paint job.
Apply the Primer
Primer is a step you shouldn’t skip, even though it might not always get the spotlight. It’s really important for creating a smooth, even surface for your paint. Primer helps the paint stick better and can make the final color look more even. It also helps cover up any stains or old colors that might show through.
Choose the Perfect Paint
Now that your surface is prepped and primed, it’s time to choose your paint! Think about how you use the room, how much natural light it gets, and the overall look you want to achieve.
If you want to hide imperfections, a flat finish is a good choice. For areas that get a lot of use, like kitchens and bathrooms, you might prefer a satin or eggshell finish, which has a bit of shine and is easier to clean.
Paint the Correct Way
Painting might seem tricky at first, but with a few helpful tips, you can get a professional-looking finish.
To start, use different tools for different areas. For edges and trim, a brush is your best friend. It allows you to get into those tight spots and create clean lines. For larger areas, a roller is more efficient and covers more space quickly.
Restore Your Home’s Interior Beauty With a Quality Painting Job
With some planning and a bit of effort, you can turn those damaged walls into a beautiful backdrop for your home. If you’re excited to start but feel like you could use some extra help, don’t worry.
The expert team at Stirling Painting is ready to assist you. We can guide you through every step of the process, from fixing any damage to picking out the perfect paint color. Get a free estimate to get started.
Recent Comments